


Your cart is empty.
3D Easter Bells Display

3D Easter Bells Display


In this Easter activity, we will create a beautiful 3D display using transparent plastic bells. To personalize this display to their tastes, children can paint it and attach lots of lovely stickers.
An easy and fun craft to keep children entertained as Easter approaches.
Thèmes de l'idéa créa :
#Funny Characters Tutorials
#Craft Tutorials
#Board Tutorials
#Easter Tutorials
How to make this craft step-by-step:
Materials:

To create this board you will need:
- A square wooden board 18 x 18 cm
- A plastic bell
- Two metallic bells
- Two large fabric bows
- Googly eyes Ø 1.8 cm
- Easter stickers
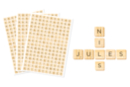
- Scrabble letter stickers
- Paint (turquoise blue, white, gold) and a brush
- Screwing hooks
- Linen thread
- A glue gun
- A black permanent marker
- A pair of scissors
Step 1:

To begin, paint the wooden support by mixing turquoise blue and white to achieve a sky blue color.
Allow to dry for 20 minutes.
Step 2:

Open a plastic bell and then remove the hard card shape and the string.
Paint the inside of the half-bells in gold (in 2 to 3 layers).
Let dry for 20 minutes.
Step 3:

Using a glue gun, attach the two half-bells to the wooden base.
Step 4:

Glue two small metal bells with the glue gun.
Step 5:

Glue two moving eyes Ø 1.8 cm and a large fabric bow onto the bells.
Step 6:

Draw smiles with a black marker.
Step 7:

Stick scrabble stickers to form "Happy Easter".
Step 8:

Stick Easter egg stickers under the top bell to create the illusion that it is distributing them.
Step 9:

Note: this step may require the help of an adult.
Attach 2 metal hooks to the edge of the wooden support.
Attach a piece of linen thread to each hook so that you can hang your creation.
Materials Needed:
Materials Needed:



3,49€
Available




2,99€ (either 1,00 € / pc)
Available




Other tutorials on the theme "Easter Tutorials"




 5/5



Vos créations inspirées par ce tuto

See also
-
-
-
-
-
-
-
-
-
-
-
-
-
-

Made with my 1-year-old and 5-year-old daughters
Réaliser avec mes filles de 1 ans et 5 ans