


Your cart is empty.
Butterflies with Diffuser Paper and Markers


Butterflies with Diffuser Paper and Markers
In this new craft activity, children will learn to make beautiful butterflies using diffuser paper. With this diffuser paper, markers, and a little water, we will create stunning color blends in the spirit of "tie and dye".
An engaging and original activity that is sure to delight children!
How to make this craft step-by-step:
Materials:

To make a butterfly you will need:
- Two hearts made of diffuser paper
- Thick-tipped markers
- A 50 cm caterpillar
- A flat reservoir brush
- A hole punch
- A stapler
- Transparent nylon thread
- A cutting mat
- A work surface
- A pair of scissors
Optional materials:
- A heat gun
Step 1:

To start, color two hearts made of diffuser paper with thick felt markers.
Step 2:

Fill the brush reservoir with water.
Press down on the reservoir to wet the brush and paint the hearts. This will allow the inks to diffuse into the paper to create nice color blends.
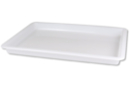
Tip: we recommend performing this step on a tray to avoid staining your work surface.
Step 3:

Then allow the two paper hearts to dry for approximately 2 hours.
Tip: Use a heat gun or a hairdryer to reduce the drying time.
Step 4:

Fold the two hearts accordion-style.
Step 5:

Stack the two hearts in opposite directions (point to point) and staple them in the center.
Step 6:

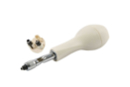
Using a punch, make a hole just above the staple.
Tip: Use a cutting board to avoid damaging your work surface.
Step 7:

Fold a 50 cm caterpillar in half.
Twist one part and keep the rest to make two pretty antennas.
Step 8 :

Pass the pipe cleaner through the hole to set up the butterfly's body.
Step 9:

Unfold the wings on each side to give the butterfly some span.
Step 10:

Finally, tie nylon thread around the chenille so that it can be suspended.
Materials Needed:
Materials Needed:






Other tutorials on the theme "Glue and Fold Tutorials"

 5/5








Customer review
Give your feedback
Butterflies with Diffuser Paper and Markers
Be the first to share your review of this product.
Post a review