


Your cart is empty.
Chick with a Paper Plate (EASY)

Chick with a Paper Plate (EASY)


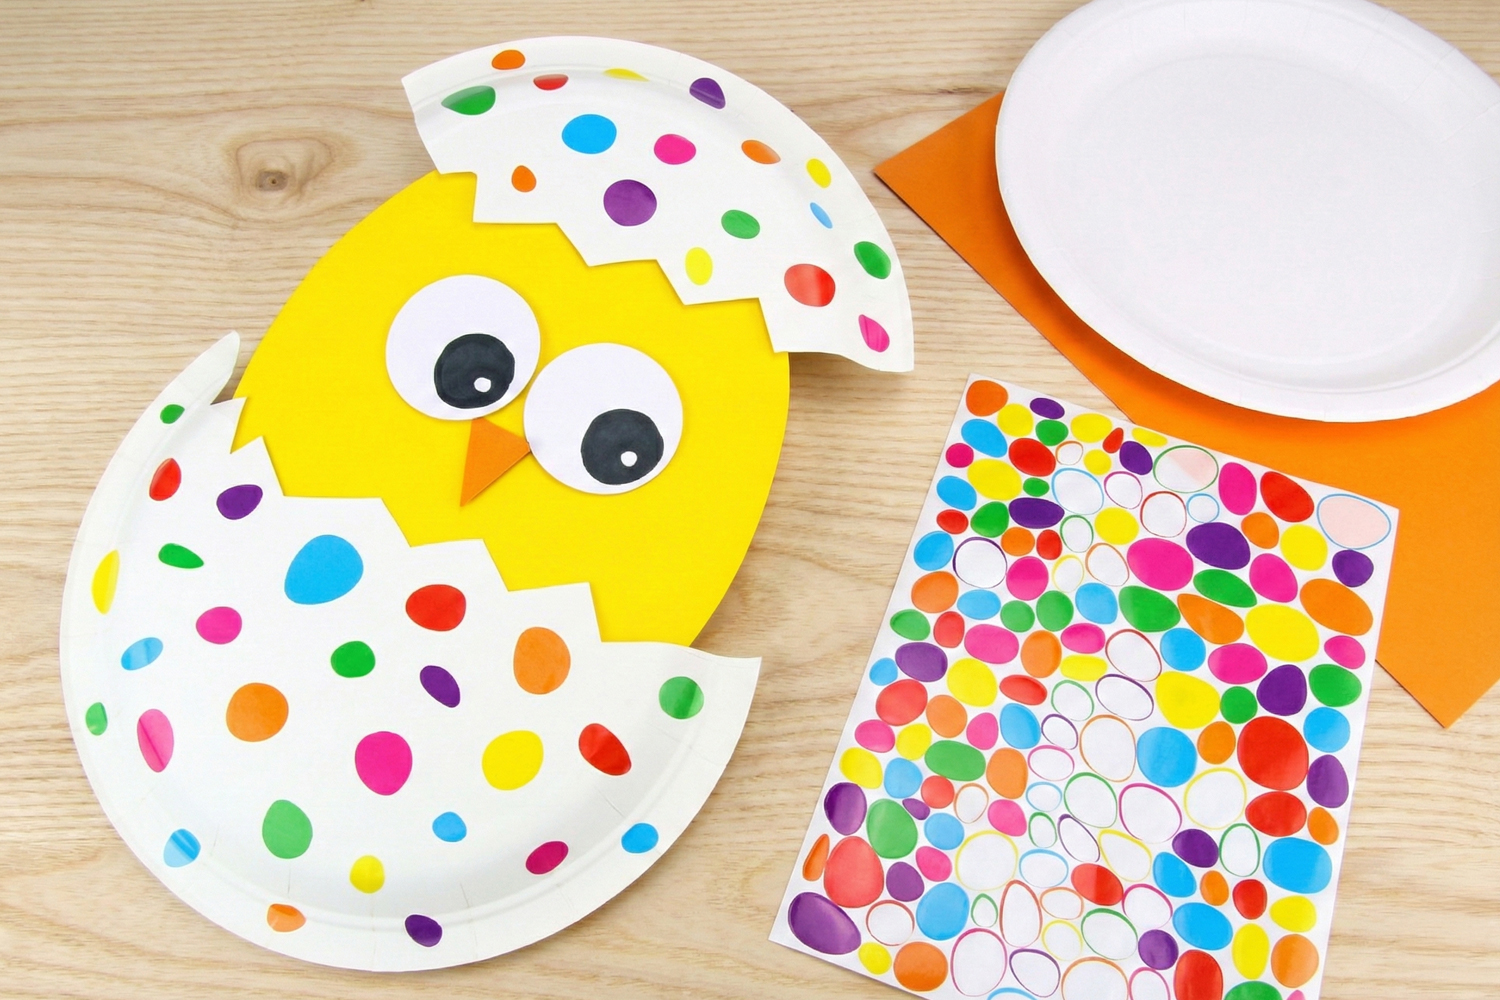
Transform a simple cardboard plate into an absolutely irresistible chick with this fun and colorful tutorial.
By combining a cardboard plate, colored paper, and stickers, your little artists will bring a cheerful chick to life in no time. This is the perfect cutting and gluing activity to introduce the youngest to the joys of Easter while creating a handmade decoration that will brighten up your home.
Why we love this activity?
-
A guaranteed success for little ones: the simplicity of the shapes allows children, even beginners, to achieve a lovely result.
-
Learning precise movements: handling stickers and trying out gluing develops hand-eye coordination in a gentle and fun way.
Thèmes de l'idéa créa :
#Easter Tutorials
#I Stick Stickers
#Animal Tutorials
#Glue and Fold Tutorials
How to make this craft step-by-step:
Materials
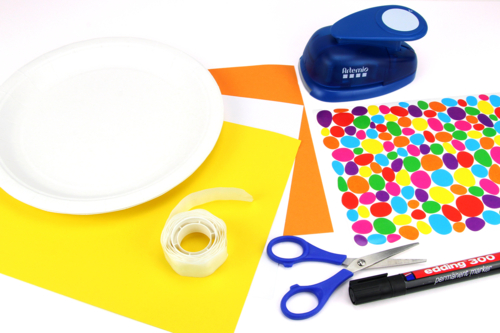
To make a pretty chick, you will need:
- a white cardboard plate
- a thick yellow cardstock (300 g/m² - A4)
- a thick orange cardstock (300 g/m² - A4)
- a thick white cardstock (300 g/m² - A4)
- mosaic stickers
- gel adhesive dots
- a pair of scissors
- a black marker
Optional: a 5 cm round hole punch
Step 1
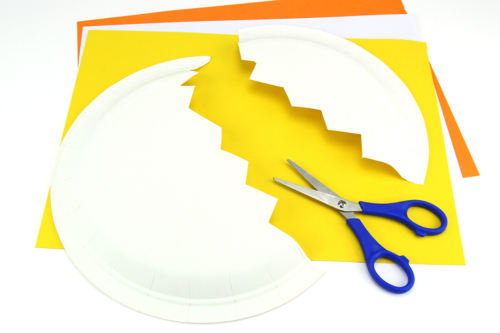
Cut the plate in a "zig-zag" pattern to create the two parts of the chick's shell.
Cutting proportion of the plate: 1/3 for the top of the shell, 2/3 for the bottom of the shell.
Step 2
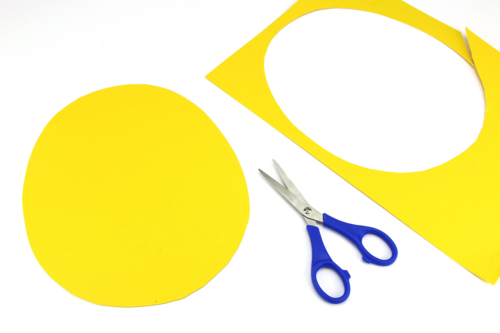
Cut out an egg shape approximately 20 cm tall from a sturdy yellow card to create the chick's base.
Step 3
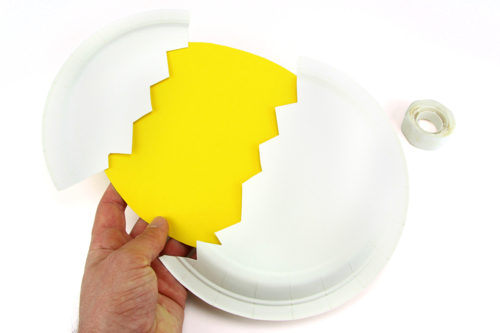
Glue the base and the top of the shell onto the chick using gel adhesive dots.
Step 4
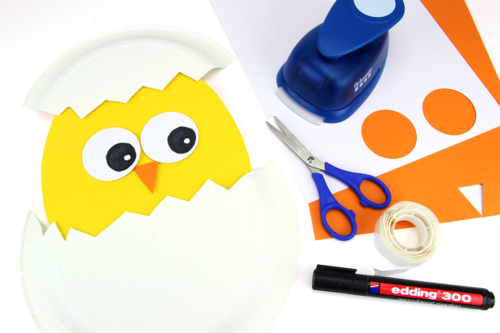
Cut out 2 eyes of Ø 5 cm from a sturdy white card and draw the pupils with a black marker.
Cut out the chick's beak from a sturdy orange card.
Stick the cut-out shapes with adhesive dots.
Step 5
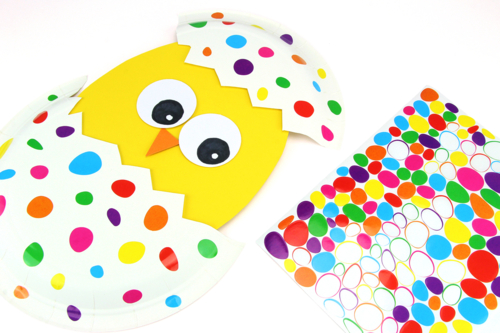
Decorate the chick's shell with pretty colored stickers.
Materials Needed:
Materials Needed:


3,59€ (either 0,36 € / pc)
Available

3,59€ (either 0,36 € / pc)
Available

3,59€ (either 0,36 € / pc)
Available

3,49€
Available

2,29€
Available


Other tutorials on the theme "Easter Tutorials"








 5/5
Vos créations inspirées par ce tuto
Customer review
Give your feedback
Chick with a Paper Plate (EASY)
Be the first to share your review of this product.
Post a review