


Your cart is empty.
Mother's Day Bookmark





Mother's Day Bookmark

Today, we are going to show you a super easy method to make pretty paper bookmarks.
This is a simple and fun activity that will help your children develop their creativity while creating a useful object. With just a few basic supplies and a little imagination, we will learn how to fold, cut, and decorate paper to create unique and personalized bookmarks. Whether it's to mark their favorite page in their beloved book or to give as a gift for Mother's Day, our bookmarks will become cherished keepsakes and faithful companions during reading breaks.
Thèmes de l'idéa créa :
#Mother's Day Tutorials
#Animal Tutorials
#Grandmothers' Day Tutorials
#DIY Tutorials for Parents' Day
How to make this craft step-by-step:
Materials

To make a bookmark you will need:
- a bicolored sheet of paper (20 x 20 cm)
- bird stickers
- heart stickers
- "Happy Celebration" stickers
- a glue stick
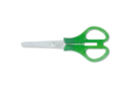
- a pair of scissors
Step 1

Choose a square sheet of two-colored paper and then fold it into 4.
Step 2

Unfold the sheet and cut a square (a quarter of the sheet) along the crease marks.
Step 3

Fold the tips on the sides towards the center of the sheet and then glue the two parts as shown in the photo.
Step 4

Place the colored square towards you and then fold the right side (without sticking it) as shown in the photo.
Step 5

Glue the left side of the sheet and then fold it to create a two-colored square.
Step 6

Assemble a beautiful colorful bird with our rubber stickers.
Step 7

Remove the protective film from the back of the bird and then stick it on the top part of the bookmark.
Step 8

On the lower part of the bookmark, stick a large heart sticker (non-glittery) and then stick a second sticker (glittery and smaller) on top of the first.
Materials Needed:
Materials Needed:



Other tutorials on the theme "Mother's Day Tutorials"







 5/5


Customer review
Give your feedback
Mother's Day Bookmark
Be the first to share your review of this product.
Post a review