


Your cart is empty.
Halloween Crafts






Halloween Crafts


These handcrafted lanterns, with vibrant colors and iconic silhouettes, will transform your ambiance for the spookiest night of the year. This tutorial is a great opportunity to share a fun moment with family while preparing to welcome little monsters in the streets.
Thanks to the varnish technique, gluing, and the use of tissue paper, each lantern emits a soft, diffused orange glow, reminiscent of traditional pumpkins. The black patterns, available for download (bats, lettering "Halloween", grinning pumpkin, and magic cauldron), stand out with perfect clarity for a striking shadow play effect.
Optimal safety: Using LED candles allows for safe decoration of children's rooms or window sills.
Complete this creation with other customizable Halloween lanterns and set up the perfect ambiance for the season.
Thèmes de l'idéa créa :
#Halloween Tutorials
How to make this craft step-by-step:
Step 1: Preparing the visuals for your lanterns

Downloading the template: Start by downloading the free template available on our site to get the patterns.
Printing the patterns: Print the document on standard white paper.
Cutting the elements: Using scissors, carefully cut out the 4 strips of paper following the outlines.
Setting up: Slide each strip inside one of your 4 plastic pots so that the pattern is clearly visible through transparency.
Step 2: Cleaning and tracing the Halloween silhouettes

Preparing the surface: Before applying any color, clean the outside of your pots to ensure perfect adhesion of the paint. You can use a brush cleaner, as shown here, or household alcohol to degrease the surface. Make sure the surface is completely dry before proceeding to drawing.
Drawing the patterns: Use a black Posca marker to trace each silhouette through transparency. Carefully follow the outlines of the patterns and then fill in the inside of the shapes to achieve opaque silhouettes.
Tip: If you accidentally go over the lines, a small cotton swab dipped in water will help erase minor mistakes.
Step 3: Finalizing the drawing and drying

Repeat the tracing operation on all remaining pots.
Once the ink is dry to the touch, you can gently remove the strips of paper inside the pots.
While drying, prepare your tissue paper for the next step: Tear off medium-sized pieces of orange tissue paper by hand to facilitate application inside the pot.
Step 4: Applying the tissue paper and varnish-gluing

Varnish-gluing technique:
First layer: Using a brush, apply a thin layer of glue varnish on the inside wall of your plastic pot.
Placing the paper: Gently place a piece of orange tissue paper on the glued area.
Protection and finishing: Immediately cover the paper with another thin layer of glue varnish to secure and smooth it out.
Step 5: Total coverage of the lantern

Total coverage: Continue applying your pieces of orange tissue paper over the entire inner surface of the container. Slightly overlap each new piece of paper over the previous one to ensure consistent opacity.
Tip: Apply a final layer of glue varnish over everything to seal the edges well and achieve a smooth surface.
Step 6: Protection and sparkling finish

Apply a layer of glitter varnish over the entire outer surface of the pot to add shine and a magical effect to your patterns.
Protection of the patterns: This varnish serves as a protective layer, preventing the marker drawings from getting scratched or worn over time.
Sustainable tip: By protecting the outside of your lanterns this way, you can easily store them after the party and bring them out next year for another Halloween celebration, without losing their charm.
Final Step: Lighting up your lanterns

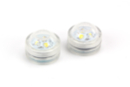
Use small submersible LED lights or battery-operated candles for heat-free lighting.
Simply place an LED unit at the bottom of each pot; once lit, the light shines through the orange tissue paper, highlighting your black silhouettes (ghosts, bats, witch hats) through a play of shadows.
You can leave the lanterns open or replace the silver lids for a more finished look.
Materials Needed:
Materials Needed:


3,99€ (either 0,17 € / pc)
Available from December 2026


6,98€ (either 3,49 € / pc)
Available





 5/5




The pots are very small and even with children's hands, it's very difficult to stick paper inside! The glue purchased is white and therefore leaves marks on the wall when too much is applied, and the paper doesn't stick well on it. The lantern is difficult to light due to the small size of the jar. I do not recommend this purchase.
Les pots dont très petits et même avec des mains d'enfant c'est très difficile de coller du papier à l'intérieur! La colle achetée est blanche et du coup elle laisse des traces sur la paroi quand on en met trop, et le papier ne colle pas bien dessus. La lanterne est difficile à allumer su fait de la petitesse du bocal. je ne recommande pas cet achat