


Your cart is empty.
Autumn Tree in Rolled Paper





Autumn Tree in Rolled Paper


Looking for a kids' craft for autumn?
Follow this simple and fun tutorial to create a beautiful autumn tree using the rolled paper technique. This activity is perfect for children as it is a great way for them to express their creativity using simple materials.
The autumn tree made of rolled paper can then serve as a seasonal decoration for your home or classroom.
How to make this craft step-by-step:
Materials:

To make a rolled paper tree, you will need:
- a sheet of thick white paper
- lightweight colored paper sheets (red, orange, yellow, green, brown)
- a solid brown gouache stick
- tree leaf stickers
- a grass effect sheet
- a glue roller
- a paper cutter
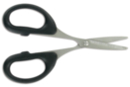
- a pair of scissors
Step 1:

To start, draw the trunk of the tree on a sheet of paper using a brown poster paint stick.
Step 2:

Cut about 10 strips of paper using the paper cutter.
Here, we have chosen the colors of autumn: yellow, orange, red, green, and brown.
Step 3:

Apply the glue roller in a semicircular and horizontal manner above the trunk as shown in the image.
Step 4:

Place the ends of the paper strips on the semicircle using glue, alternating the colors.
Step 5:

Roll the strips of paper one by one and stick them onto the horizontal strip of glue roller.
Step 6:

To glue the last strips, apply the glue roller directly onto the strip so that you can slide it between the other strips to achieve a uniform foliage.
Step 7:

Glue the tree leaf stickers all around.
Step 8:

And finally, cut a strip of grass effect fabric and glue it at the bottom of the sheet.
Materials Needed:
Materials Needed:

3,59€ (either 0,36 € / pc)
Available

19,90€ (either 0,04 € / pc)
Available

9,99€ (either 0,83 € / pc)
Available



 5/5






My little one, who is 6 years old, loved making it.
Ma petite en garde de 6 ans à adoré le faire