


Your cart is empty.
Christmas Frame with Ice Cream Sticks

Christmas Frame with Ice Cream Sticks


In this new easy Christmas activity, we will create a lovely frame using wooden sticks, Christmas patterned papers, and various accessories.
Tip: using adhesive dots in this craft allowed us to easily and quickly attach all the elements while creating a beautiful 3D effect!
An easy creative activity full of colors that children can do from the age of 5.
Thèmes de l'idéa créa :
#Craft Tutorials
#Upcycling Tutorials
#Frame Tutorials
#Christmas Crafts
#Christmas Ornement
#Adult Tutorials
How to make this craft step-by-step:
Matériel :

Pour fabriquer une suspension cadre de Noël il faut :
- une jolie photo
- 4 grands bâtonnets en bois (15,5 cm)
- des cartes fortes aux motifs de Noël
- des stickers rennes
- des stickers sapins
- des lettres "scrabble" en bois
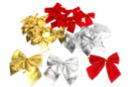
- un gros nœud en tissu
- de la ficelle bicolore
- des bâtons de gouache métallisés
- des pastilles adhésives
- une paire de ciseaux
Step 1:

Decorate 2 large wooden sticks with metallic poster paint.
Note: The poster paints are very opaque and dry almost instantly!
Step 2:

Form a square using 4 sticks (2 plain + 2 colored) and then glue them together with adhesive dots to create the frame structure.
Step 3:

Cut two pieces of Christmas string and tie them on each side of the frame.
Step 4:

Tie the two pieces of string together so you can hang the frame in the tree.
Step 5:

Cut a square to the dimensions of the frame from a sturdy Christmas-patterned cardstock and then glue it to the back of the frame using adhesive dots.
Step 6:

Stick tree (or reindeer) stickers onto uncoloured wooden sticks.
Step 7:

Using adhesive dots, stick the scrabble letters to form the word "Christmas".
Step 8:

Stick a large fabric bow with an adhesive dot.
Step 9:

Finally, stick a photo in the center of the frame.
Materials Needed:
Materials Needed:


2,49€
Available

3,49€
Available







 5/5

Vos créations inspirées par ce tuto
Customer review
Give your feedback
Christmas Frame with Ice Cream Sticks
Be the first to share your review of this product.
Post a review