


Your cart is empty.
Father Christmas's Sleigh





Father Christmas's Sleigh


Using cardboard pots, craft sticks, some paint, and a few stickers, we will show you how to easily create a lovely sleigh to complement your Christmas decorations!
Paint, glue, assemble: this craft activity invites children to explore different techniques, handle various materials, and develop their creativity while having fun.
An ideal project to introduce little ones to the joys of crafting!
How to make this craft step-by-step:
Materials

To make a Santa's sleigh, you will need:
- 2 natural fiber pots
- 3 wooden sticks (15 cm)
- red/gold paint and a brush
- Christmas rubber stickers
- mini gifts
- festive message stickers
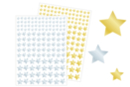
- star stickers
- a glue gun
- a pair of scissors
Step 1

Paint the 2 pots with gold paint and the 3 wooden sticks with red paint.
Let it dry for about an hour.
Step 2

Glue the two pots together (one facing up, the other facing down) with the hot glue gun to create the sleigh structure.
Step 3

Glue 2 sticks on either side of the sled using the glue gun.
Step 4

Cut the final red stick in half and then stick a Santa Claus sticker on one of the two pieces.
Step 5

Cut a flap in the pot placed upside down.
Step 6

Place Santa Claus in the sleigh and glue him to the tab of the trap with the glue gun.
Step 7

Decorate the sleigh with the rubber stickers:
- a reindeer at the front of the sleigh
- a tree at the back of the sleigh
- a gingerbread man on the side of the sleigh
Note: with one pack of stickers, you can create 3 sleighs.
Step 8

Place and glue 2 mini gifts in the pot at the back of the sleigh.
Step 9

Decorate the sled runners by sticking a sticker with a Christmas message as well as star stickers.
Materials Needed:
Materials Needed:


2,99€ (either 1,00 € / pc)
Available


1,89€
Available




 5/5






Very good, easy to make and it makes people happy
Super bien , facile à réaliser et ça fait des heureux