


Your cart is empty.
Ladybug Box

Ladybug Box
In this easy activity, we will transform a simple cardboard box into an adorable ladybug covered in rhinestones!
A creative spring craft that children will love.
How to make this craft step-by-step:
Materials

To make a ladybug box you need:
- a round cardboard box
- a polystyrene ball Ø 5 cm
- red and black paint
- a paintbrush
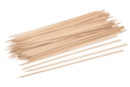
- a skewer
- movable eyes Ø 1.8 cm
- black caterpillars
- black rhinestones
- a white paint marker
- a glue gun
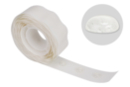
- gel adhesive dots
- a pair of scissors
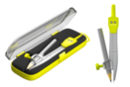
- a compass
Step 1

Paint the cardboard box red and the 5 cm Ø polystyrene ball black.
TIP: you can stick the polystyrene ball on a skewer so you can paint it without getting your hands dirty!
Step 2

Make 6 holes on the sides of the cardboard box using the point of a compass and then insert black chenille stems to create the 6 legs of the ladybug.
Step 3

Cut the excess chenille and bend the ladybug's legs.
Step 4

Glue the polystyrene ball to the edge of the box lid using a glue gun (for instant and durable adhesion).
Step 5

Stick 2 googly eyes using adhesive dots or the glue gun.
Step 6

Cut 2 pieces of chenille about 8 cm long, twist the ends and insert them into the polystyrene ball to create the antennas of the ladybug.
Step 7

Glue rhinestones onto the lid of the box.
Step 8

Draw a pretty smile with a white paint marker.
Materials Needed:
Materials Needed:

5,96€ (either 1,49 € / pc)
Available

Polystyrene Balls Ø 5 cm - 10 Pieces
Réf. 10361 - See the full range
2,39€ (either 0,24 € / pc)
Available

2,99€ (either 1,00 € / pc)
Available



Other tutorials on the theme "Animal Tutorials"


 5/5





Vos créations inspirées par ce tuto
Customer review
Give your feedback
Ladybug Box
Be the first to share your review of this product.
Post a review