


Your cart is empty.
Mireille the little bee


Mireille the little bee


Discover an easy craft that is perfect for spring.
With a wooden base, paper, and paint, children will embark on a fun creative workshop to make beautiful bees.
To create lovely wings, kids will use iridescent paper that will give a majestic look to this adorable flying insect! The bees can then be easily hung in the rooms of your little artists to create a cute and personalized decoration.
How to make this craft step-by-step:
Materials

To make a nice bee you will need:
- a round wooden base (Ø 18 cm)
- yellow paint and a brush
- a black card stock
- an iridescent card
- 2 half polystyrene balls Ø 5.5 cm
- a black marker
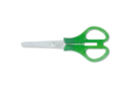
- a pair of scissors
- a stick of strong glue
- a frame hanger
Step 1

Paint the wooden support with yellow acrylic paint and then let it dry for about 30 minutes.
Step 2

Draw black circles in the center of the polystyrene half-balls to create the bee's eyes.
Glue the 2 eyes at the top of the wooden support using the glue stick, then draw a nice smile with the marker.
Step 3

Cut 3 strips of paper the width of a black cardstock and glue them onto the body of the bee.
Step 4

Cut the excess paper with a pair of scissors.
Step 5

Cut a dart and then 2 antennae from the black paper, then glue them to the back of the wooden support.
Step 6

Cut out 4 wings from a sheet of iridescent paper and glue them to the back of the wooden base.
The iridescent paper will create a stunning effect on the children's creation!
Step 7

Apply a small amount of glue on the frame attachment with the strong glue stick and then stick it to the back of the bee so it can be easily hung in the house or in the children's room!
Materials Needed:
Materials Needed:

5,94€ (either 0,99 € / pc)
Available

2,99€ (either 1,00 € / pc)
Available

3,59€ (either 0,36 € / pc)
Available


2,49€ (either 0,42 € / pc)
Available

5,94€ (either 0,99 € / pc)
Available


Other tutorials on the theme "Animal Tutorials"


 5/5






Vos créations inspirées par ce tuto
Customer review
Give your feedback
Mireille the little bee
Be the first to share your review of this product.
Post a review