


Your cart is empty.
Personalised Christmas Ornament


Personalised Christmas Ornament


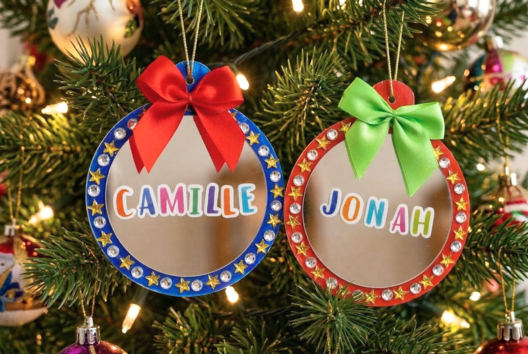
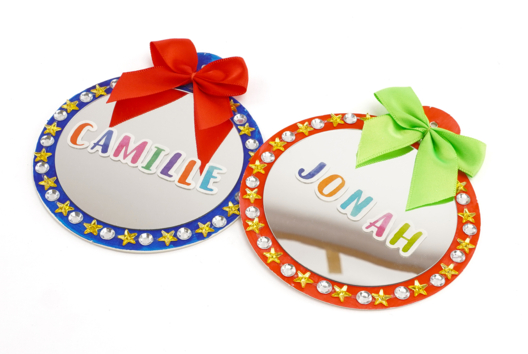
This craft project shows you how to make personalised Christmas baubles using modelling clay, paint and small letter stamps.
It’s a creative activity your kids will enjoy as they make and gift personalised baubles to family members. Everyone will have a lovely keepsake to hang on the tree each year!
How to make this craft step-by-step:

Step 1

Take about 80 g of modelling clay and roll it into a ball. Then flatten it on a modelling mat using a rolling pin.
Keep the thickness between 0.5 and 1 cm to make a sturdy bauble.
Note: With 1 kg of modelling clay, you can make 10 to 15 baubles depending on their thickness.
Step 2

Cut out the bauble shape using the cookie cutter.
Step 3

Arrange the letter stamps on the ruler to spell out a name or word to personalise the bauble.
Note: You can personalise baubles with names up to 8 letters long.
Step 4

Stamp the name onto the modelling clay bauble.
Tip: Test the letters on a scrap piece of clay first to make sure the name is the right way round!
Step 5

Use a wooden skewer or toothpick to make a small hole at the top of the bauble.
Leave the clay to dry overnight. Turn the bauble after a few hours to dry both sides thoroughly.
Step 6

Place a piece of masking tape to mark the area to paint.
Paint the lower part of the bauble with acrylic paint.
Step 7

Once the paint is dry, stick a shiny adhesive tape between the painted and unpainted areas for a neat finish.
Step 8

Glue a small fabric bow at the top of the bauble.
Step 9

Attach a cord so you can hang the personalised bauble on the Christmas tree.
Materials Needed:
Materials Needed:


Maxi metal cookie cutters: tree, star, ball
Réf. 42750 - Product sheet
2,99€ (either 1,00 € / pc)
Available



Acrylic Paint 60 ml - 6 Pastel Colors
Réf. 55518 - Product sheet
11,94€ (either 1,99 € / pc)
Available

2,99€ (either 1,00 € / pc)
Available


Other tutorials on the theme "Christmas Tutorials"





 5/5
Customer review
Give your feedback
Personalised Christmas Ornament
Be the first to share your review of this product.
Post a review