


Your cart is empty.
Make a Butterfly with Paper Strips

Make a Butterfly with Paper Strips
Discover a simple tip today for creating beautiful, colorful butterflies using paper strips.
An easy creative activity that combines cutting and gluing for children from the age of 5 !
How to make this craft step-by-step:
Materials

To make a pretty butterfly, you will need:
- colored A4 paper sheets
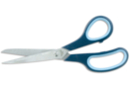
- a pair of scissors
- a glue stick
- googly eyes Ø 2.5 cm
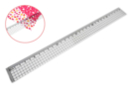
A practical accessory for cutting regular strips of paper: the paper cutter.
Step 1

Cut 8 strips of paper measuring 2 cm x 30 cm from A4 colored paper sheets.
These strips will be used to create the wings of the butterfly.
Tip: use a guillotine for quick and regular cutting!
Step 2

Cut another strip of paper measuring 4 cm x 30 cm, which will be used to make the body of the butterfly.
Step 3

Fold the widest strip of paper in half.
Step 4

Glue the 8 thin strips of paper onto the top part of the large strip of paper.
Step 5

Glue the two ends of the paper strips together to form the wings of the butterfly.
Step 6

Apply glue to the lower part of the central strip and then fold everything to create the body of the butterfly.
Step 7

Cut 2 strips of paper approximately 1 cm x 15 cm.
Step 8

Wrap the 2 strips around a pencil to make the butterfly's antennae.
Step 9

Glue the 2 antennas behind the body of the butterfly and then glue 2 movable eyes Ø 2.5 cm.
Step 10

Draw a pretty smile with a black marker.
Step 11

Cut geometric shapes out of paper to decorate the body of the butterfly.
Step 12

Glue the small paper shapes onto the body of the butterfly to complete your creation.
Materials Needed:
Materials Needed:
26,99€ (either 0,11 € / pc)
Available

1,39€
Available

Other tutorials on the theme "Glue and Fold Tutorials"

 5/5




Customer review
Give your feedback
Make a Butterfly with Paper Strips
Be the first to share your review of this product.
Post a review