


Your cart is empty.
Glow-in-the-Dark Bat


Glow-in-the-Dark Bat


Discover an exciting activity to do with kids for Halloween !
Using a plastic egg, some paper, and a small LED light, we will show you how to make a glow-in-the-dark bat.
These little flying creatures will light up your home while adding a unique touch to your Halloween decor. Kids will love doing this creative activity to prepare for the scariest night of the year !
How to make this craft step-by-step:
Materials

To create a glowing bat, you will need:
- a colored plastic egg (two interlocking parts)
- monster eye stickers
- a mini LED bulb
- a black marker
- a black cardstock
- a black pom-pom
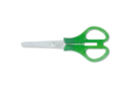
- a pair of scissors
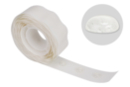
- adhesive dots
Step 1

Stick 2 monster eyes with adhesive dots, making sure to align the 2 holes at the top of the plastic egg as shown in the photo.
Step 2

Draw the mouth of the bat using a black permanent marker.
Step 3

Open the plastic egg and insert a black caterpillar into the 2 holes located at the bottom of the egg.
Step 4

Twist the 2 strands of chenille under the egg to align the legs correctly.
Then cut 2 small pieces of chenille and tie them to the ends of the chenille to create the legs.
Step 5

Fold a black cardstock in half, draw a bat wing, and then cut it out with a pair of scissors to create symmetrical wings.
Step 6

Glue the bat wings onto the egg using 2 adhesive dots.
Step 7

Open the egg and then pass the cord of the mini bulb through the hole located at the back (closest to the wings).
Step 8

Close the plastic egg and pull on the cord to turn on the bulb and make your bat shine in the dark.
Conveniently, the bulb's cord will allow you to easily hang your creation!
Step 9

Once night falls, the LED bulbs will illuminate and highlight the color of the bats in the dark.
Materials Needed:
Materials Needed:


3,59€ (either 0,36 € / pc)
Available

1,99€
Available
Other tutorials on the theme "Halloween Tutorials"







 5/5







Customer review
Give your feedback
Glow-in-the-Dark Bat
Be the first to share your review of this product.
Post a review